30A Guide to Beach Architecture Photos
Simple tips for photographing 30A cottages, pavilions, and walkovers: best light, composition, angles, and essential gear.
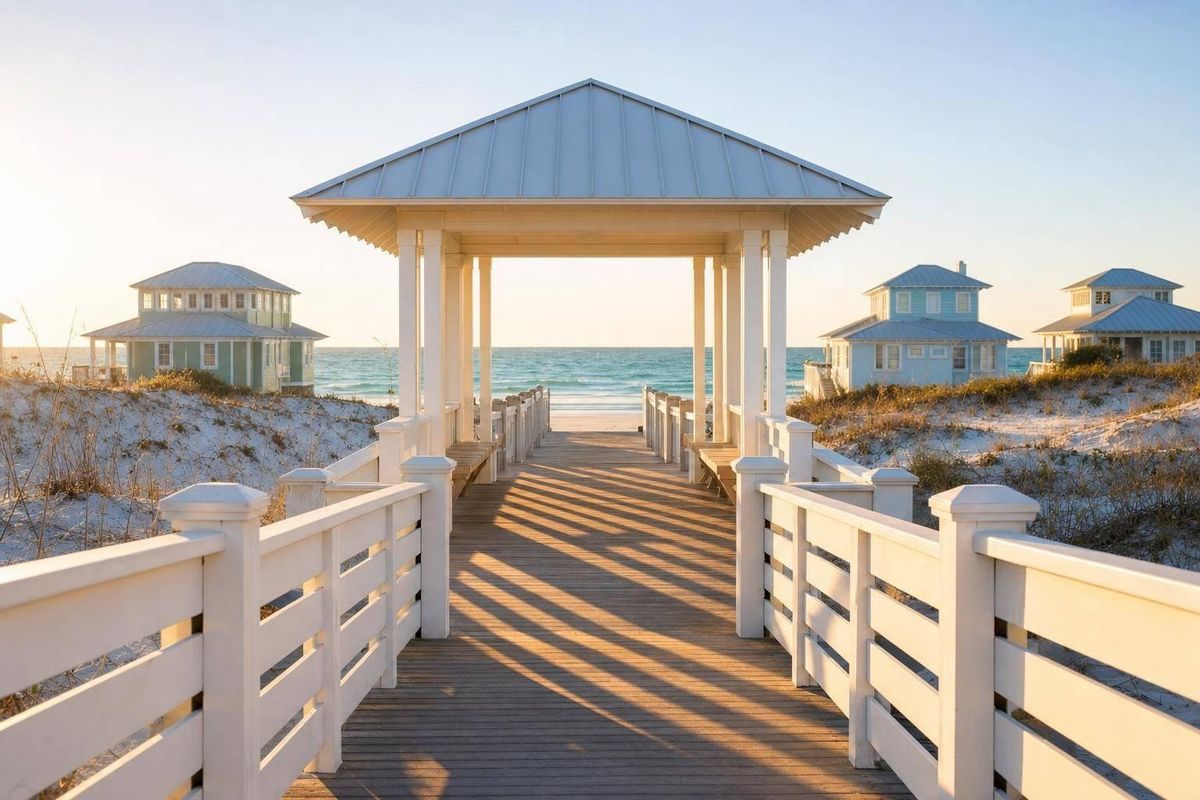
The short answer: if I want better 30A architecture photos, I shoot within 1–2 hours of sunrise or sunset, keep the horizon level, use boardwalks and fences as leading lines, and match my angle to the structure. On Scenic Highway 30A’s 24-mile stretch, that simple approach works for cottages, dune homes, pavilions, and walkovers.
Here’s the full takeaway in plain English:
- Best light: early morning, golden hour, and blue hour
- Midday fix: cut exposure by about 1/3 to 1 stop when sand and white walls get too bright
- Best framing: use paths, rails, dunes, and open sky
- Best angles: corner views for houses, centered views for pavilions, top-down or straight-path views for walkovers
- Best gear: a phone is enough, but a compact camera or small mirrorless with a 16–35 mm equivalent lens gives more control
- Best habits: stay on public access paths, respect private property, and wipe salt spray off the lens
If I had to boil the article down even more, it would be this: light first, composition second, angle third, gear last. That order matters because even a simple phone shot can look strong when the timing and framing are right.
Quick comparison
| Topic | What works best | Simple tip |
|---|---|---|
| Light | Sunrise and sunset | Arrive 20–45 minutes early |
| White facades + sand | Lower exposure | Start with -0.3 EV |
| Cottages and dune homes | Corner angle | Show the front and side together |
| Pavilions | Centered framing | Line up stairs, rails, and roof peak |
| Walkovers | Low or raised viewpoint | Use railings and path lines |
| Blue hour | Tripod | Helps keep lines sharp |
| Overcast days | Even facade light | Crop out dull gray sky when possible |
About 3 core composition moves show up again and again in this guide: leading lines, open space, and level horizons. Add a clean lens, a charged battery, and public access awareness, and you’re set.
Below, I’d walk through how to use those steps on 30A without overpacking or overthinking.
Find the best light for sand, sky, and white facades
Once you know what to shoot, timing is the next call. Along 30A, white siding, bright sand, and open sky can create a lot of contrast fast. Get the light wrong, and detail disappears in a hurry. Get it right, and sand, sky, and white facades all start to work together.
Early morning: soft contrast and fewer people
The first hour after sunrise is usually the easiest time to shoot along 30A. The sun stays low, and that low angle brings out railings, porch columns, and siding texture without throwing harsh shadows everywhere. White walls keep their detail instead of clipping to pure white.
There’s another perk: fewer people. Right after sunrise, boardwalks and beach access points are often much easier to photograph cleanly. Try to arrive 20–30 minutes before sunrise if you want the best pre-dawn color.
Summer humidity can make bright surfaces wash out more than you expect. In those conditions, reduce exposure by about 1/3 stop to help bright siding hold detail through the haze.
Golden hour and blue hour: warmer tones and cleaner mood
Late afternoon and evening give you two strong looks: warm golden hour and cool blue hour.
Golden hour gives cottages and pavilions warm, directional light. White trim starts to pick up cream and gold tones, wood boardwalks show more texture, and long shadows from porch posts and stair rails add a nice visual rhythm. Plan to arrive 30–45 minutes before sunset so you can catch the shift into richer color.
Blue hour starts about 20–40 minutes after sunset, when the sky turns cool blue and purple. Lit windows and porch lights stand out against the dim sky, which gives exterior scenes a calm, lived-in feel. A lightweight travel tripod helps here, since slow shutter speeds can blur straight architectural lines.
When midday sun and overcast skies still work
Midday light, roughly from 10:00 a.m. to 3:00 p.m., is the least forgiving. It can blow out white facades and make sand look too bright. A small exposure cut, about 1/3 to 1 stop, can help, and you can recover some shadows later in editing. Shooting RAW gives you more room to pull back highlights. It also helps to frame more of the building and less of the sky. If the sky takes up too much of the shot, the camera may underexpose the architecture.
Overcast days don’t get enough credit for 30A architecture. Clouds spread soft, even light across facades, porches, and decorative trim. Symmetrical shots often look cleaner in this kind of light because both sides stay evenly lit. When you can, keep gray sky out of the frame and fill the shot with architecture and foreground details like fences or landscaping instead. Then composition can carry the image.
sbb-itb-d06eda6
Build stronger compositions with lines, contrast, and level horizons
Once the light looks right, composition is what makes the photo feel deliberate. After that, it’s all about shaping the frame with lines and open space. A strong beach photo often comes down to three things: clear lines, open sky, and a level horizon that helps the architecture stand out.
Use boardwalks, fences, and dunes as leading lines
30A’s boardwalks, fences, and dune paths already do a lot of the heavy lifting. Use them.
Stand a little off to one side of the path, then angle your camera so the boards start in the lower left or lower right corner and lead toward the building or the Gulf. That small shift adds depth fast. The same idea works with dune fencing and sandy path edges. Set them in the lower third of the frame so they point toward a pavilion or dune home instead of running flat across the image.
If you stand dead center on a boardwalk, the scene can feel flat, and the railings start to look like a tunnel. Step to one side, lower the camera a bit, and wait for a clear break in foot traffic.
That same move works on dune paths and fences when there’s no boardwalk nearby.
Frame cottages and pavilions against open sky
Open sky or sand around a structure gives it room to stand out. Keep the horizon low so the roofline sits against open sky. Simple, symmetrical structures in places like Seaside or Alys Beach respond especially well to this setup. Place the building in the upper third, leave a broad area of blue or pastel sky around it, and let the silhouette do the work.
When nearby buildings, signs, or parked cars start creeping into that sky area, move your feet before you zoom. A shift of just a few yards left or right can hide distractions behind dunes, palms, or the structure itself. Lowering your angle and tilting a little upward can also clear ground-level clutter from the frame.
Use symmetry or off-center balance and keep the horizon straight
Use centered symmetry for pavilions and entries. Use off-center balance for dune homes. Keep the horizon low when you want more sky, and place it higher when the foreground texture matters more.
For a centered pavilion shot, put the structure’s central axis in the middle of the frame and let repeating columns or railings create rhythm on both sides. For a dune home in a place like Blue Mountain Beach, try putting the house on the right third with a sweep of sand and sea on the left. That gives the viewer a sense of space and setting, not just the house by itself.
After you place the lines, check the horizon before you shoot. No matter how you frame it, keep the horizon level. The Gulf’s waterline is a strong visual reference, and even a small tilt can make buildings look crooked. Use your phone or camera’s built-in grid, then line the horizon up with a horizontal grid line before you shoot. If a roof overlaps the waterline, check the horizon again before pressing the shutter.
Choose the right angles for cottages, dune homes, pavilions, and walkovers
Once your lines are set, the next move is simple: pick the angle that fits the structure. After light and composition, viewpoint is what gives the building its shape and presence.
Cottages and dune homes: low angles, corners, and wider scenes
For cottages and dune homes, a corner angle usually beats a flat, straight-on shot. Stand where the front and side of the house meet, and you’ll show two sides at once. That makes wraparound porches, layered rooflines, and stacked balconies read much better than they do from a head-on view. In 30A towns like Seaside and Rosemary Beach, where homes often have deep porches and detailed trim, that extra dimension matters.
Pair that corner angle with a lower camera height - around waist level, or even a slight crouch - and the house starts to feel taller. It also gives more weight to the stairs, stilts, and porch structure, which is a big deal on 30A, where many homes sit up on pilings or dunes. One thing helps here: keep the camera level instead of tilting it hard upward. Need more of the house in frame? Step back a few feet rather than forcing the angle.
A few small adjustments can clean up the shot fast:
- Move your feet to clear distractions.
- Use a 24–35 mm view for a wide, natural frame.
Pavilions and beach access structures: center lines and roof shape
With symmetrical pavilions, the approach changes. Instead of working from the corner, go straight to the centerline. Stand in line with the stairs or walkway and place the roof peak, stairs, and rails right in the middle of the frame. When both sides match, the repeating rails and posts create a steady rhythm, and the roof shape stands out cleanly against the sky.
If you want to give the roof line more presence, lower the camera a bit and let the peak sit against open sky. Then step back a few feet. That small move often brings in deck edges, cast shadows, and a slice of beach without ruining the symmetry.
Crowds can make a dead-center shot tough. When that happens, shift three or four paces to one side and shoot diagonally along the railing. That off-center angle can still look great, especially late in the day when low sun throws long shadows across the planks and the repeating posts start to do a lot of the work for you.
Walkovers and raised viewpoints: paths, rooftops, and beach context
Walkovers call for a different mindset. Here, the goal is less about the building itself and more about elevation, lines, and context.
From the base, center the walkover and shoot level from chest height, about 4 feet. If you drop to about 30 inches, the descending lines feel more dynamic, and the repeating vertical supports under the structure become much more noticeable.
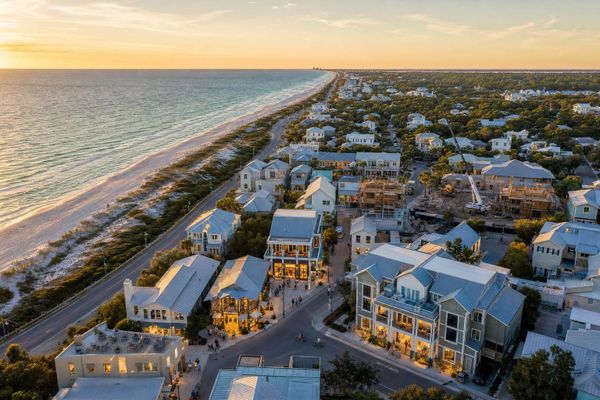
Another strong option is to turn back toward the neighborhood from the top of a walkover. That higher position shows rooftop patterns, dune layers, and the way homes sit in relation to the shoreline - details you just can’t see from street level. You can also use the walkover’s railings in the foreground to frame the shot, with cottage rooflines and the Gulf stacked behind them. From the top, turn toward the neighborhood to show rooftops, dunes, and shoreline in one frame.
Pack a simple kit and follow a clear shot list
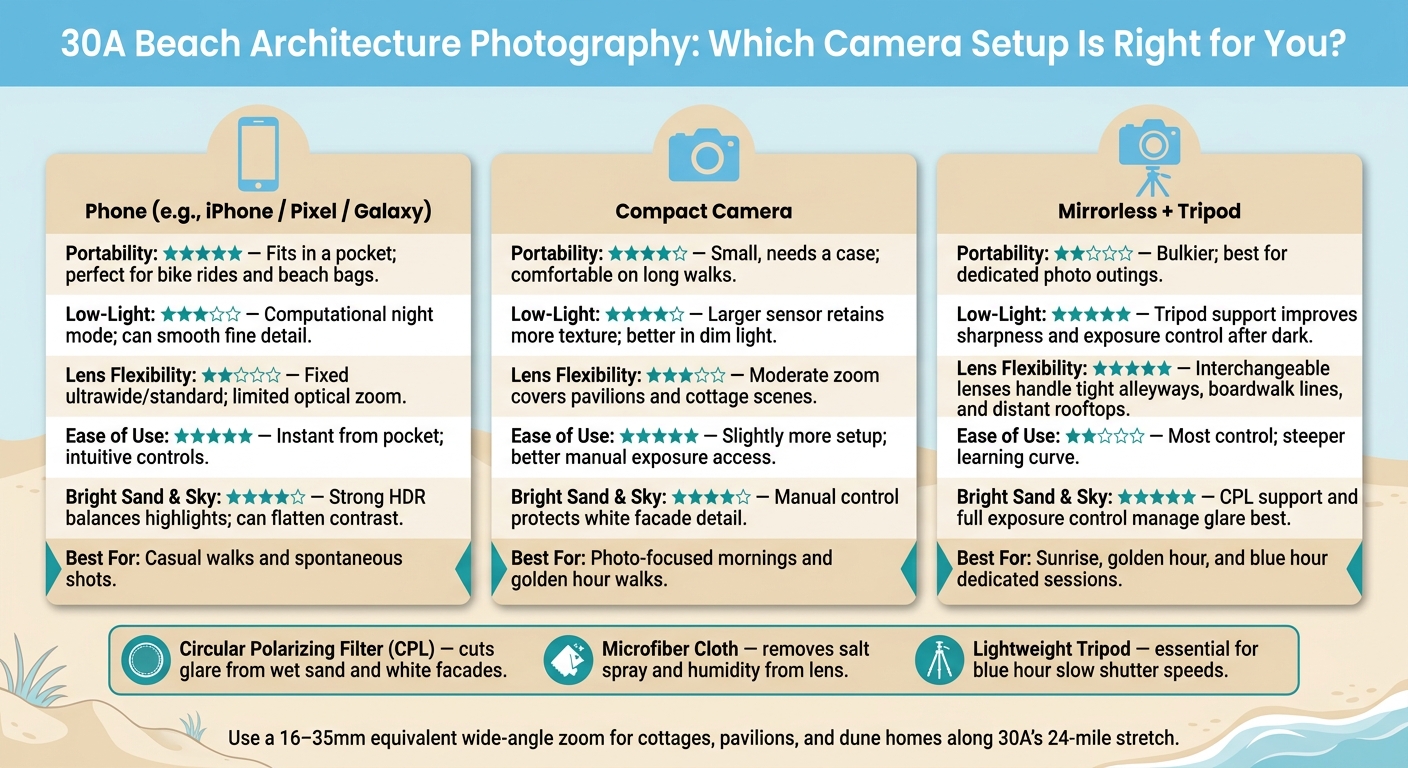
30A Beach Architecture Photography: Camera Gear Comparison Guide
Simple gear that works best on 30A
Once you’ve picked the light and your angle, bring only the gear that helps you move fast and keep your shots clean.
You don’t need a huge camera bag to make good architecture photos along 30A. A smartphone - like an iPhone, Pixel, or Galaxy - can handle most scenes and slips into a pocket or small sling. If you want a bit more control, go with a compact camera or a small mirrorless with a 16–35 mm equivalent wide-angle zoom. That setup works well for cottages, pavilions, and dune homes without making you stop to change lenses.
Beyond the camera, three items do most of the heavy lifting:
- Circular polarizing filter (CPL): cuts glare from wet sand and white facades
- Microfiber cloth: wipes away salt spray and humidity from your lens
- Lightweight tripod: helps during blue hour when the light drops
Pack light so you can move easily between boardwalks and dune paths. The aim is simple: move fast, keep lines clean, and have enough control for bright sand and white facades.
Phone vs compact camera vs mirrorless setup: a quick comparison
| Feature | Phone | Compact Camera | Mirrorless + Tripod |
|---|---|---|---|
| Portability | Fits in a pocket; ideal for bike rides and beach bags | Small, needs a case; comfortable on long walks | Bulkier; best for dedicated photo outings |
| Low-light performance | Computational night mode can smooth fine detail | Larger sensor retains more texture; better in dim light | Tripod support improves sharpness and exposure control after dark |
| Lens flexibility | Fixed ultrawide/standard; limited optical zoom | Moderate zoom covers most pavilions and cottage scenes | Interchangeable lenses handle tight alleyways, boardwalk lines, and distant rooftops |
| Ease of use | Instant from pocket; intuitive controls | Slightly more setup; better manual exposure access | Most control; steeper learning curve |
| Bright sand and sky | Strong HDR balances highlights but can flatten contrast | Manual control protects white facade detail | CPL support and full exposure control manage glare best |
Use a phone for casual walks, a compact camera for photo-focused mornings, and a mirrorless setup with a tripod for sunrise, golden hour, or blue hour. Each option fits a different kind of outing, and all three can handle low-angle cottage shots, centered pavilion frames, and walkover viewpoints.
Final checklist for better beach architecture photos
Before you head out, do a quick check on these basics:
- Timing: Shoot within 1–2 hours of sunrise or sunset. Overcast midday light also works well for even, shadow-free facades.
- Composition: Use boardwalks, dunes, and fences as leading lines. Frame against open sky. Keep horizons level. Match your angle to the structure.
- Gear: Make sure your phone is charged and your lens is clean. If you’re using a camera, fully charge the battery and format the card. Pack your CPL and microfiber cloth. Bring the tripod only for blue hour.
- Access and respect: Shoot from public beaches, boardwalks, sidewalks, and town squares. Stay on marked paths. Respect private property signs. Do not shoot into windows or private balconies.
For route planning, sowal.co lists public beach access points and community pavilions across South Walton.
FAQs
What camera settings work best for beach architecture?
Shoot in RAW so you have more room to deal with the harsh contrast between bright sand and shiny surfaces. Keep ISO low - usually 100–200 - for cleaner files and stronger color.
If you want sharp detail from the foreground all the way to the horizon, go with f/11. In harsh sun, tweak exposure compensation so white sand stays bright without looking dull. A polarizing filter also helps by cutting glare and making Gulf blues look deeper.
How can I avoid distorted lines in house photos?
To cut perspective distortion in house photos along 30A, keep your camera sensor parallel to the home’s facade. That simple move helps vertical lines look straighter instead of leaning in or out.
A tripod helps too. It makes it easier to keep the horizon level and the camera lined up, which can save you a lot of frustration during the shoot.
Where can I legally take photos along 30A?
You can legally take photos in Walton County parks and at Grayton Beach State Park without a permit for everyday photography.
But if you're planning a commercial shoot or a formal session - especially on the beaches - you'll need a permit and liability insurance. And no matter what kind of photos you're taking, follow park rules and respect wildlife. That means staying at least 50 feet from nesting turtles and not using flash near them.